
A Gallery Wall Template is like a blueprint for arranging your wall art. It’s a guide that helps you plan where each piece will go before you start hanging them up. Think of it as a map that shows you the best way to arrange your artwork to create a visually pleasing display.
Using a Gallery Wall Template saves you time and effort. Instead of guessing where to place each piece and making multiple nail holes in your wall, you can plan everything out beforehand. This way, you can make adjustments and experiment with different layouts without damaging your walls. Plus, it ensures that your gallery wall looks balanced and cohesive once it’s all put together.
Table of Contents
Planning Your Gallery Wall
Planning your gallery wall is the crucial first step in creating a stunning display of artwork and photos in your home. Start by choosing the perfect location for your gallery wall, considering factors like wall space, lighting, and visibility. Next, select the artwork and frames you want to include, keeping in mind the overall theme or aesthetic you want to achieve.
Once you have your pieces selected, it’s time to think about the layout. Consider different arrangement options, such as grid patterns, salon-style arrangements, or asymmetrical designs, and choose one that complements your space and showcases your artwork effectively. Take measurements and mark the wall to visualize the layout before committing to hanging anything.
By carefully planning your gallery wall, you can ensure that it not only looks visually appealing but also reflects your style and creates a focal point in your home that you’ll love to admire.
Creating a Gallery Wall Template
Creating a gallery wall template is an essential step to ensure your artwork is arranged just right before you start hanging it up. To begin, gather materials like craft paper, tape, scissors, and a pencil. Measure and mark the wall space where you want your gallery wall to be.
Next, design your template. Decide on the shape and size you want for your gallery wall and cut out corresponding pieces of craft paper. Transfer the measurements from your wall to the template pieces, making sure to accurately represent the placement of each artwork.
Once your template is ready, you can experiment with different layouts by arranging and rearranging the paper pieces on the wall. This allows you to visualize how your gallery wall will look before making any permanent holes. Creating a gallery wall template ensures that your artwork is hung in the best possible arrangement, resulting in a cohesive and visually appealing display.
Step-by-Step Guide to Making a Gallery Wall Template
Creating a gallery wall template is a straightforward process that ensures your artwork is arranged exactly how you want it before you start hanging it up.
- Choose Template Shape and Size: Decide on the shape and size you want for your gallery wall. This could be a rectangle, square, or another shape that fits your space. Consider the dimensions of your wall and the number of pieces you plan to hang.
- Transfer Measurements: Using craft paper or another large sheet of paper, mark and cut out pieces that match the shape and size of your chosen template. Measure and mark the positions of any obstacles on the wall, such as light switches or outlets.
- Mark Wall Space: Use a pencil and a level to mark the boundaries of your gallery wall on the actual wall. This will serve as a guide for arranging your template pieces.
- Arrange Template Pieces: Place your template pieces on the wall within the marked boundaries. Experiment with different layouts until you find one that you’re happy with. Use tape to temporarily secure the template pieces in place.
- Adjust as Needed: Step back and assess the layout from different angles. Make any necessary adjustments to ensure that the arrangement is balanced and visually appealing.
- Finalize Template: Once you’re satisfied with the layout, use a pencil to trace around the edges of the template pieces directly onto the wall. This will serve as a guide for hanging your artwork.
Tips for Designing an Effective Gallery Wall Template
Designing an effective gallery wall template involves balancing aesthetics and practicality.
Balance Visual Weight: Distribute the visual weight of your artwork evenly across the template. Mix larger and smaller pieces to create interest and avoid a lopsided appearance.
Play with Symmetry and Asymmetry: Experiment with both symmetrical and asymmetrical layouts to find what works best for your space. Symmetry can create a sense of order, while asymmetry adds dynamism and personality.
Incorporate Different Frame Sizes: Mix and match frame sizes to add depth and dimension to your gallery wall. Consider grouping smaller frames together or interspersing them among larger pieces for visual contrast.
Consider Wall Color and Texture: Take into account the color and texture of your wall when designing your template. Dark walls may benefit from lighter artwork, while textured walls may complement simpler frames.
Use Templates or Guides: If you’re unsure about spacing, use templates or guides to help you achieve uniformity. You can create templates from cardboard or use tools like laser levels to ensure precise placement.
Mock Up Virtually: Use online tools or apps to mock up your gallery wall virtually before committing to a layout. This allows you to experiment with different arrangements without the need for physical templates.
Factor in Lighting: Consider the direction and intensity of natural and artificial lighting in your space. Position reflective artwork away from direct light to prevent glare, and use lighting fixtures to highlight focal points.
Hanging Your Gallery Wall
Hanging your gallery wall is the fun part! Use your template to know where to put each piece. Take your time to make sure everything looks just right.
Adjust as you go. Step back and check if the spacing looks good. If not, move things around until you’re happy. Make sure each piece is secure on the wall. Use the right hooks or nails for each frame.
Think about how your artwork fits together. You can group similar pieces or make one big focal point. Keep things level and evenly spaced. If you have extra space, consider adding more artwork or decorations.
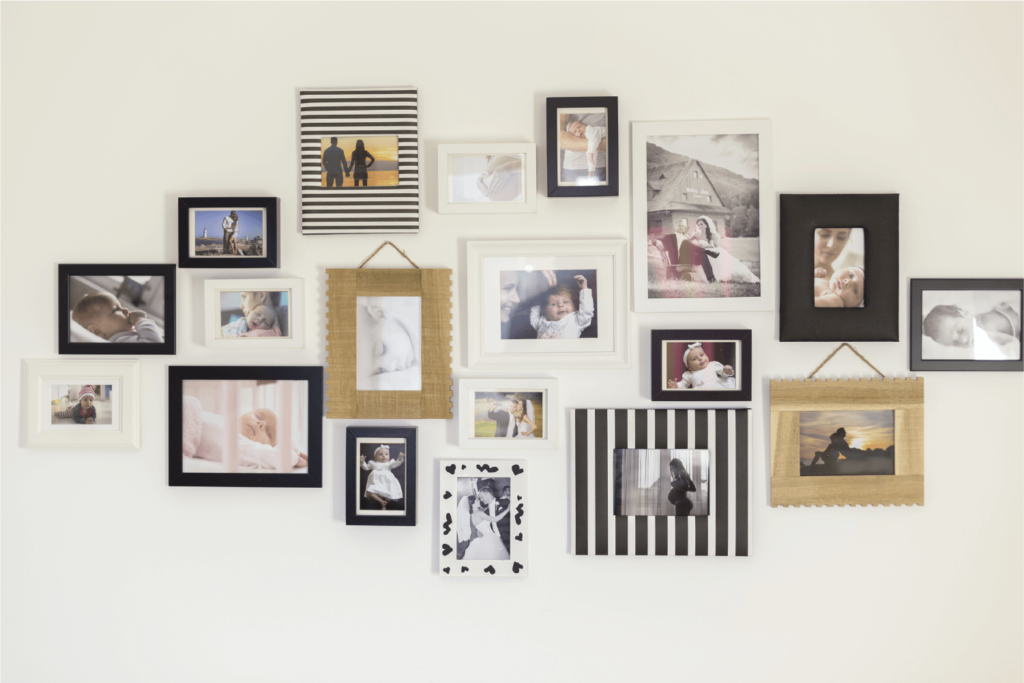
Gallery Wall Inspiration and Ideas
Whether you prefer a cohesive theme or an eclectic mix of styles, there are endless possibilities for creating a gallery wall that reflects your taste and style.
- Themed Galleries: Create a gallery wall around a specific theme, such as travel, nature, or family memories. Choose artwork and photos that relate to the theme for a cohesive and meaningful display.
- Eclectic Arrangements: Mix and match different styles of artwork for an eclectic gallery wall that reflects your personality. Combine paintings, photographs, prints, and even other decorative elements like mirrors or sculptures for an interesting and dynamic look.
- Color Coordination: Choose artwork with complementary colors to create a cohesive and visually appealing gallery wall. You can stick to a specific color palette or mix and match hues for a more eclectic vibe.
- Statement Pieces: Highlight one or two statement pieces as the focal point of your gallery wall. These could be larger artworks or photographs that draw the eye and anchor the arrangement.
- Gallery Wall Over Furniture: Extend your gallery wall over a piece of furniture, such as a sofa or sideboard, to create a cohesive look. Arrange artwork above and around the furniture to frame the space and tie everything together.
- Mix Frames and Art Styles: Experiment with different frame styles and art mediums to add depth and interest to your gallery wall. Mix vintage frames with modern artwork or combine black-and-white photos with colorful paintings for a unique and eclectic look.
- Gallery Wall in Unexpected Spaces: Don’t limit yourself to traditional gallery wall locations like living rooms or hallways. Consider creating gallery walls in unexpected spaces, such as staircases, bathrooms, or even outdoor patios, to add visual interest and personality to every corner of your home.
Conclusion
Creating a gallery wall template is a smart way to make sure your artwork looks great on your wall. By following the steps we’ve talked about, you can avoid mistakes and make your gallery wall pop.
Remember, take your time choosing the right spot, picking out artwork, and arranging it on your template. Don’t be afraid to try different layouts until you find the one you love. With a bit of patience and creativity, your gallery wall will become a standout feature in your home, showcasing your unique style and personality for all to admire.